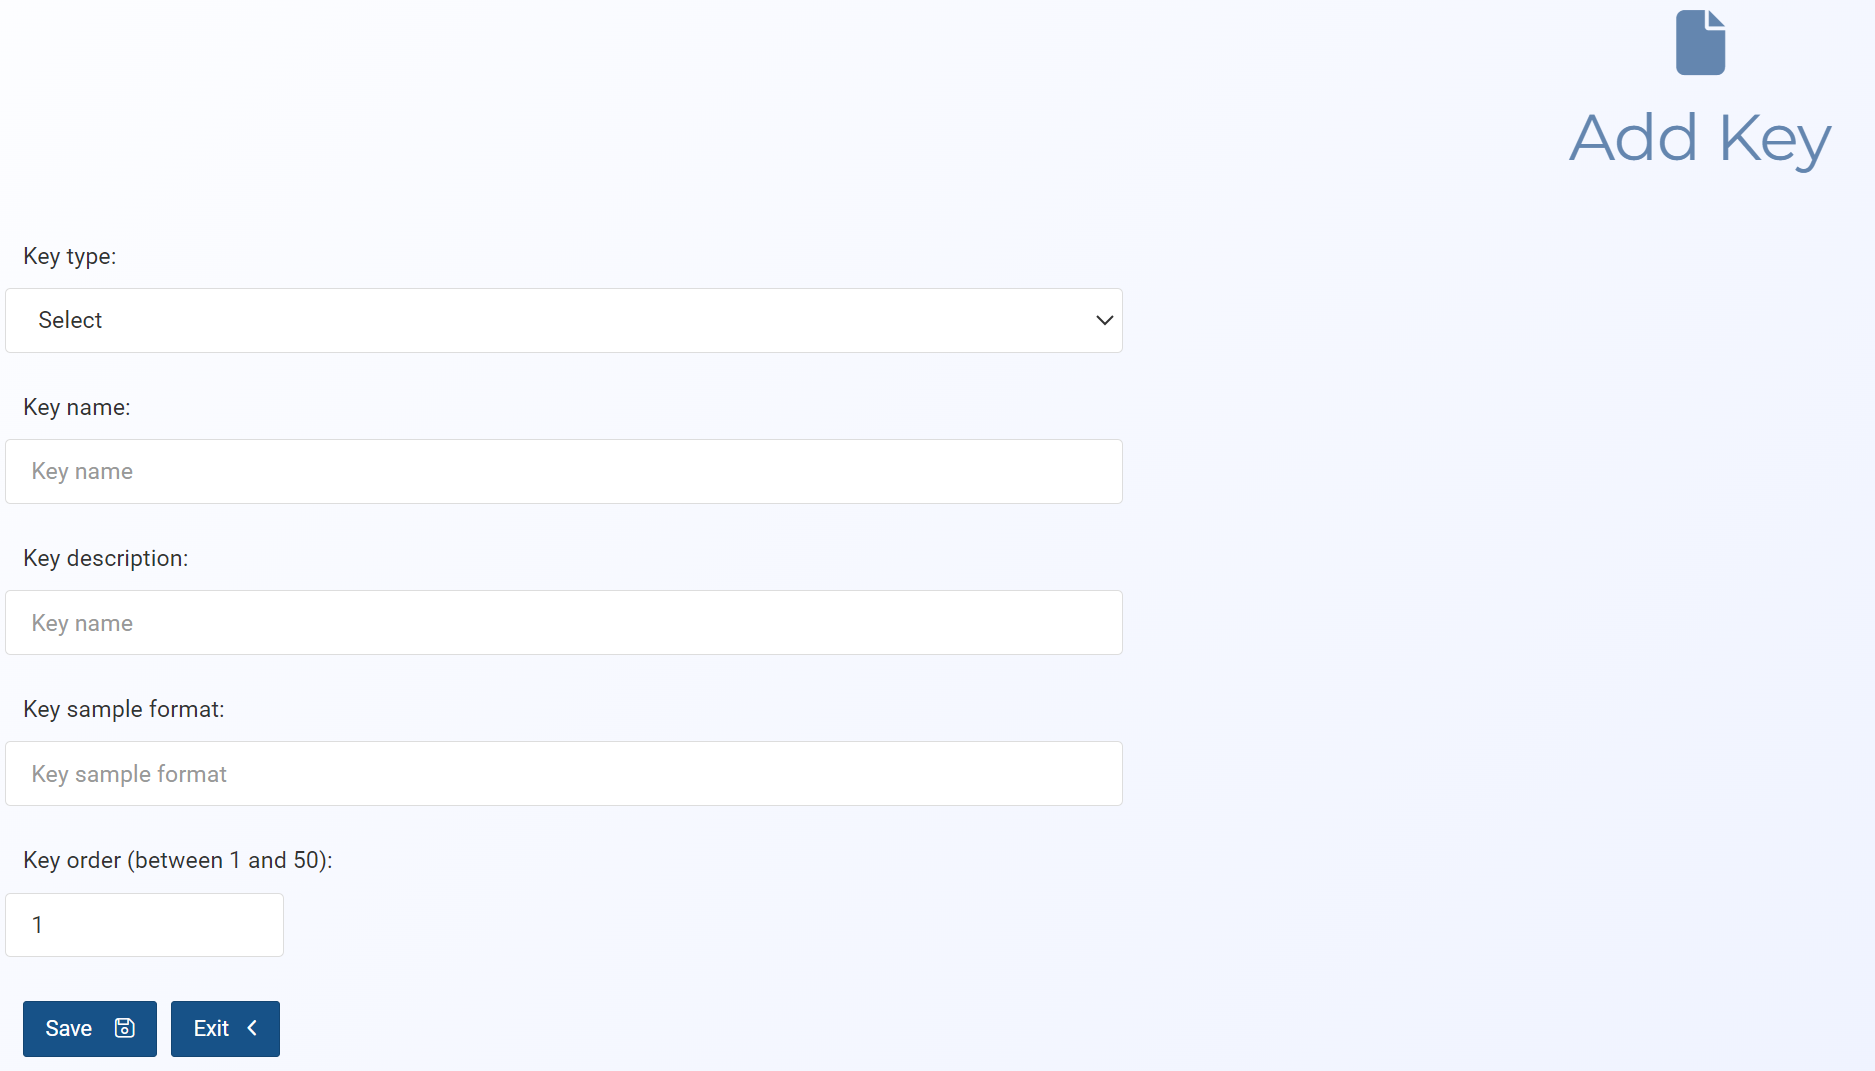
Add/Edit key screen
This topic provides an overview of the Add key and Edit key screens and all the settings and buttons on them. However if you require step-by-step procedures on creating, editing, or deleting keys refer to Managing templates and keys.
NOTE: Typically only administrators have access to this screen.
The Add key and Edit key screens allow you to define the details of each key. Keys are common words and statements, such as names and dates, that can be used in templates to help efficiently create documents such as warrant affidavits. Users can apply the templates to a case by clicking Templates on the Manage case screen and can also use templates without an associated case from the main menu by selecting Templates then Manage non-case templates. If your OSS-ESPA account also supports the OSS-SRN Express Portal then these templates are also made available to users of the OSS-SRN Express Portal.
Select the type of key you want to create:
-
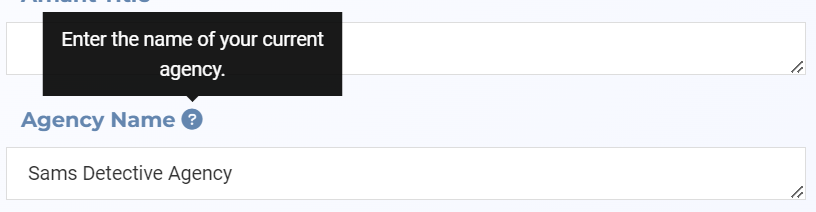
User: use this for information that is specific to an individual user. This type of key uses data from the user's account that is the same for all their cases such as their name, badge number, agency, title, assignment, years of experience, training and experience. When this option is selected you can choose whether the user requires a small or large text box for the information using Key data type. The user can enter their personal information for these keys on their Manage user keys screen and then for each template they create this information is automatically populated.
-
Case: use this for information that is specific to an investigation. This provides a section in the template for the user to manually complete details such as a report number, target phone number, service provider, date of records, and statement of probable cause. When this option is selected you can choose whether the user requires a small or large text box for the information using Key data type.
-
Global: use this for information that is relevant to the entire organization. This replaces the key with a fixed value such as the date, agency name, investigating agency, county, and district attorney. Users cannot edit these types of keys. The type of fixed value is selected in Key data type.
-
Location: use this when you are creating tower dump or geofence warrant templates where you need to enter multiple location details. For specific details refer to How to create a location key.
Enter a name for the key which must match that in your template.
Enter the name you want displayed for the key when the user is filling in the template details.
Enter an optional tip for the format or type of text the user should enter. This then appears as a pop-up tip in the template. For example, if the key is intended to be an email address you could enter xxxxx@xxx.xxx.
The options available in this menu are dependent on what Key type is set to. If Key type is set to:
-
Global, it allows you to define what type of fixed data is to be included in the template.
-
Date time today: displays the current date time using the format MM/DD/YYYY, for example 11/09/2022.
-
Current month: displays the current month, for example November.
-
Current year: displays the current year using the format YYYY, for example 2022.
-
Current day: displays the current day of the month, for example 9.
-
Text: displays a small text box in Key value where you can enter a short textual description. The text box allows you to enter a maximum of 108 characters.
-
Number: displays a small text box in Key value where you can enter a number. OSS-ESPA verifies that it is a number that is entered rather than text.
-
-
User or Case, it allows you to either select:
-
a small or large text box for the user to enter their information. The small text box allows you to enter a maximum of 108 characters. The large text box allows you to enter a maximum of 10 rows and 5000 characters. For example a title would require a small text box and a resume of qualifications would require a large text box.
-
Advanced drop down: allows you to create a type of key where the user can then select an item from a drop-down menu and this then automatically populates other keys in the template. For example, you may wish to create an advanced drop down for an assistant attorney such that when the user selects the assistant attorney's name then their additional details such as their telephone number, email, and address are automatically completed. For further information refer to How to create a pick list.
-
Calendar: allows you to either select a date or custom text.
-
Check list with separator: allows you to add checklist boxes to your templates so that the user can select the appropriate check-boxes and the output lists the check-box items one after the other, separated by a character defined in Key value.
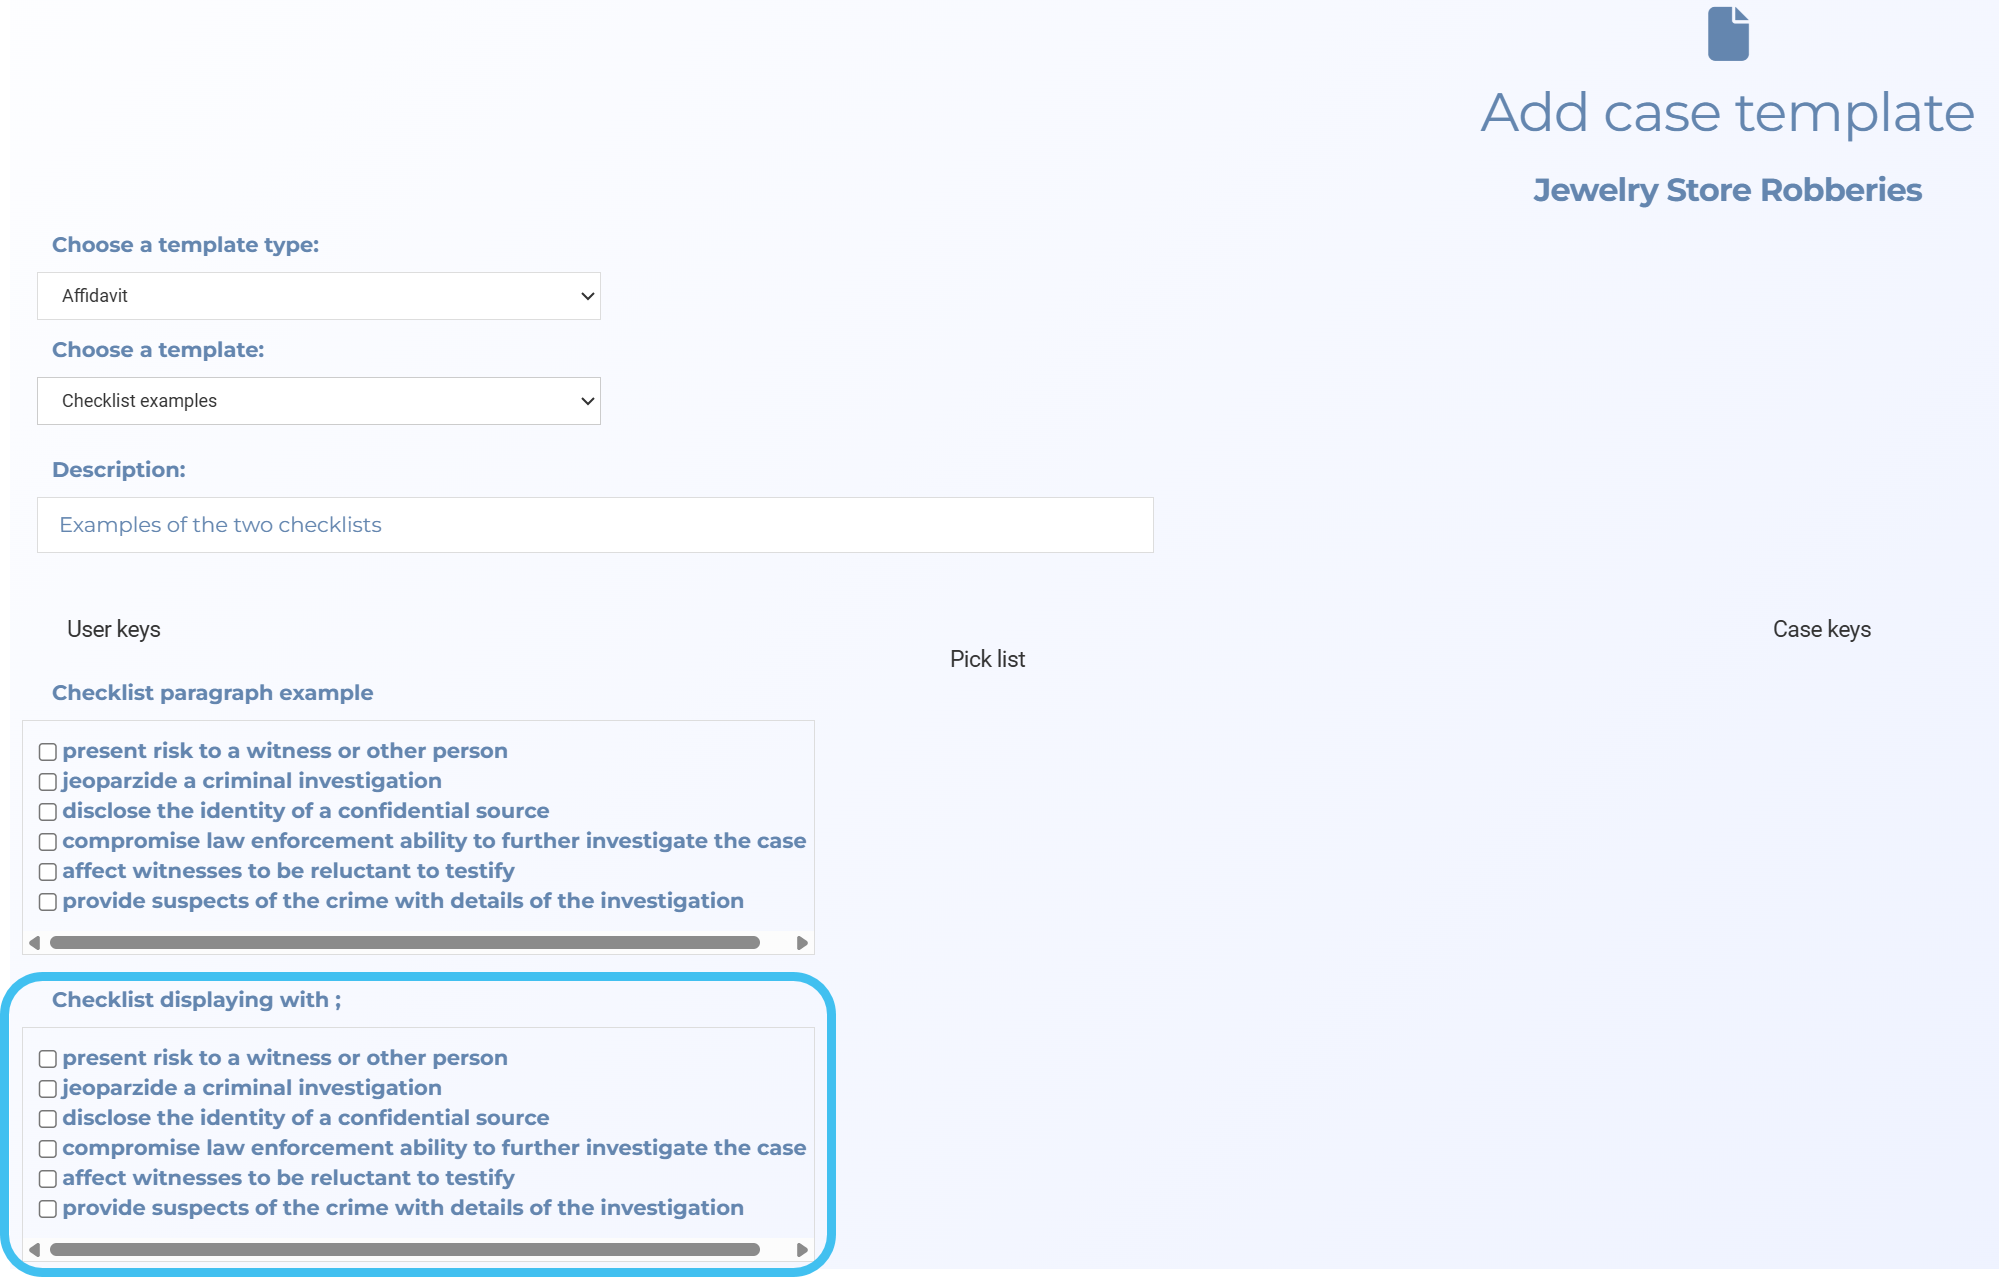
This outputs as:

-
Check list paragraph: allows you to add checklist boxes to your templates so that the user can select the appropriate check-boxes and the output lists each item on a new row.
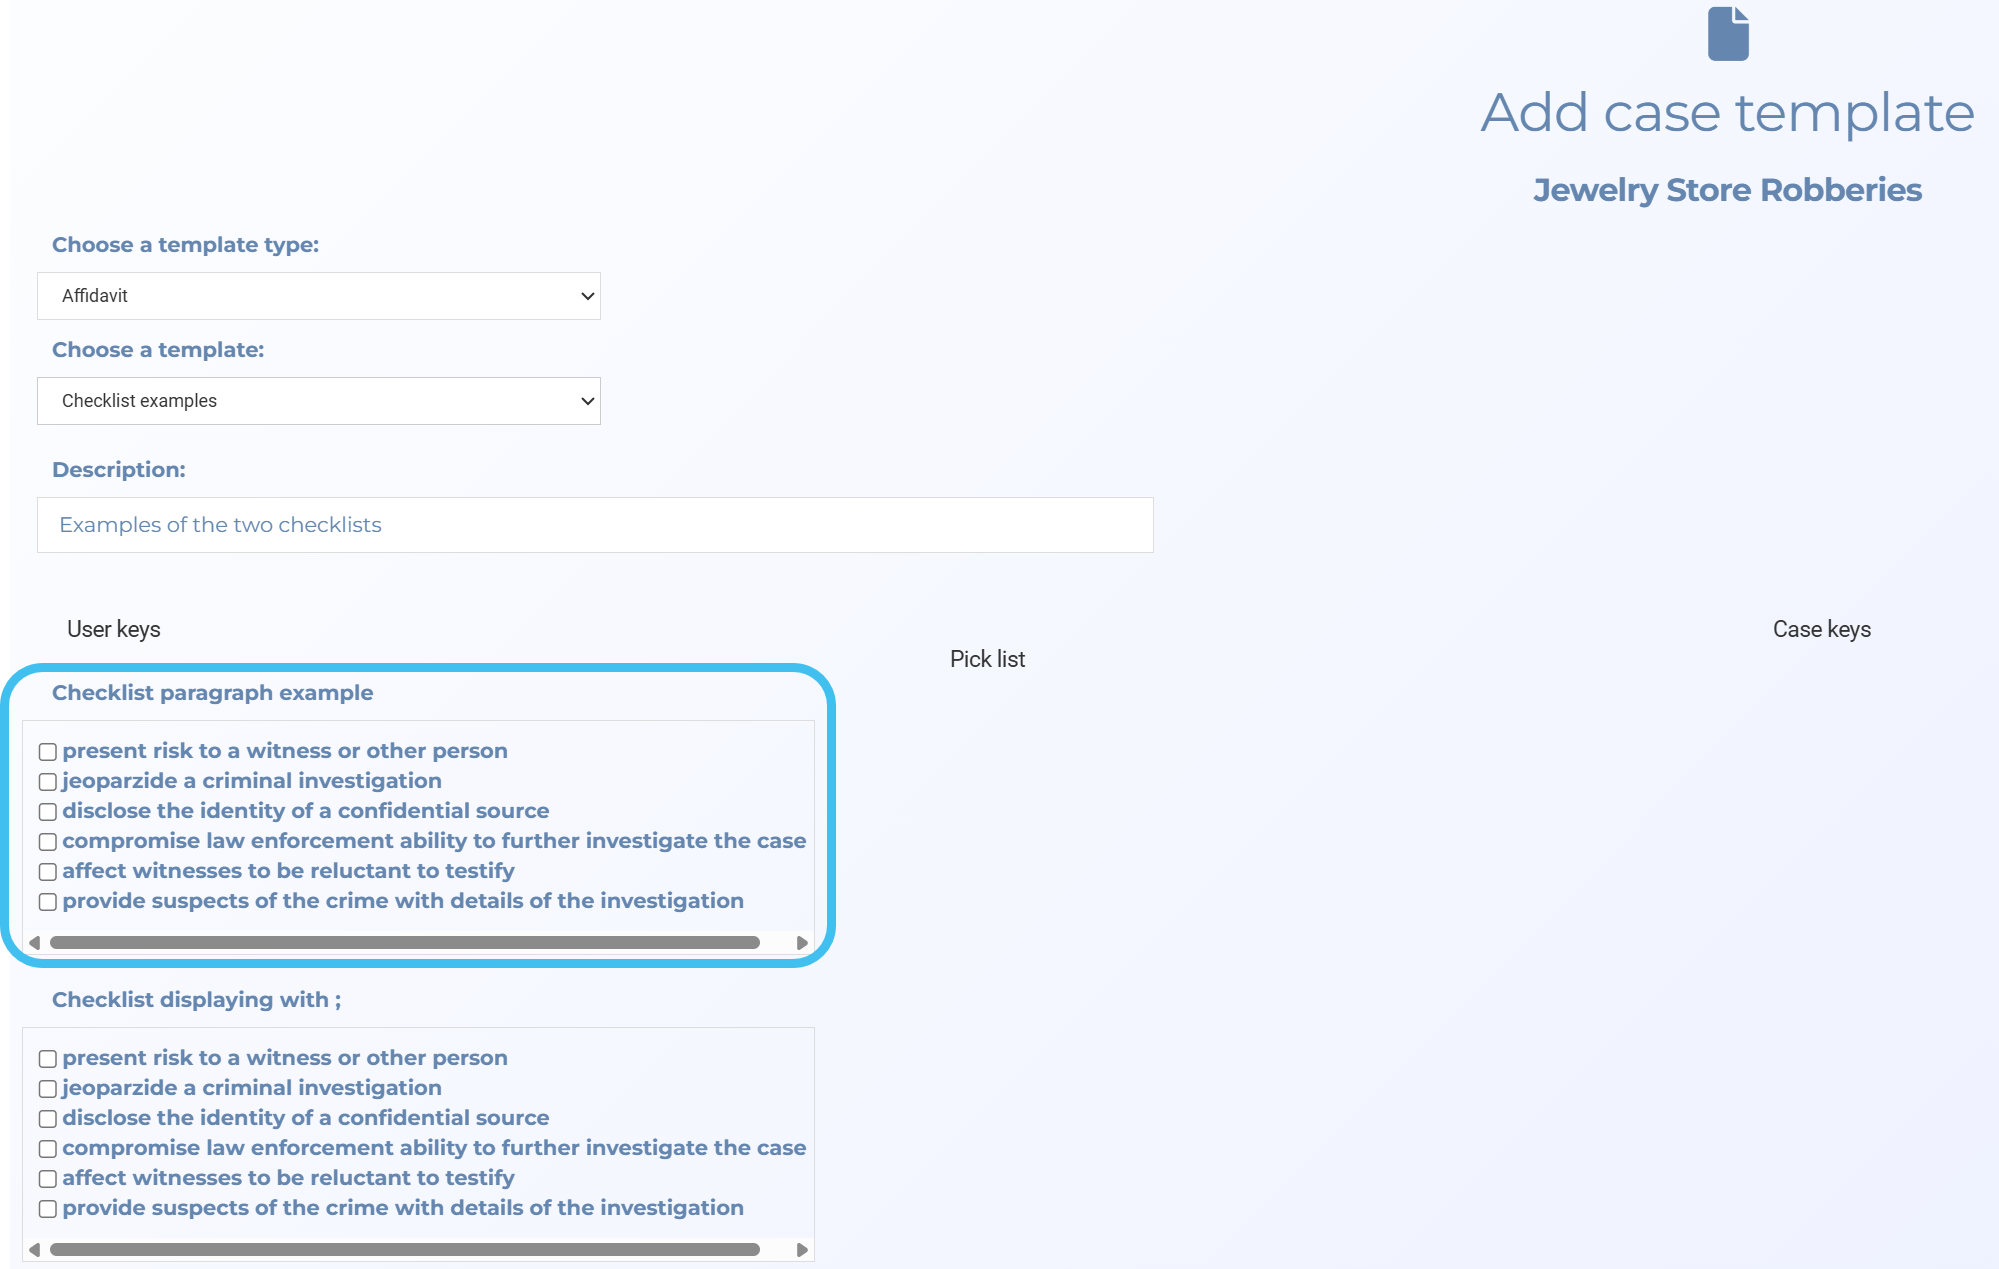
This outputs as:
-
This setting is only applicable when Key type is set to either:
-
Global and Key data type is set to either Number or Text. It allows you to enter a number or text as a fixed global key that cannot be edited by a user.
For example:
-
if you entered a Key name of "District Attorney Jones" and set Key data type to Text, you could use this field to enter the District Attorney's email.
-
if you entered a Key name of "District Attorney Jones" and set Key data type to Number, you could use this field to enter the District Attorney's phone number.
-
-
User and Case and Key data type is set to Check list with separator. It allows you to enter the character that you want to use to separate the information, for example a colon, semicolon and comma.
This setting is only applicable when Key type is set to User or Case, and Key data type is set to Calendar.
This setting can be used to add text to display when no date is selected.
Use to define the order the keys are displayed in on the Add/Edit case template screen. The keys are displayed on this screen in separate groups based on whether they are user, case, global keys or locations, therefore each key type has its own set of numbers. If you happen to apply the same number to more than one key of the same key type then they are ordered alphabetically. For example:
-
1 Affiant name
-
1 Affiant number
-
2 Affiant title
-
3 Serial number
Note, the ordering you apply here does not effect how the user keys are displayed on the Manage user keys screen.
This button is only available when Key data type is set to Advanced drop down. Click to upload the Excel file you want to use as part of your pick list. The first column of the Excel file must contain the key word you want displayed in the pick list. The other columns must contain the key words that are to be automatically populated from the pick list. For example:
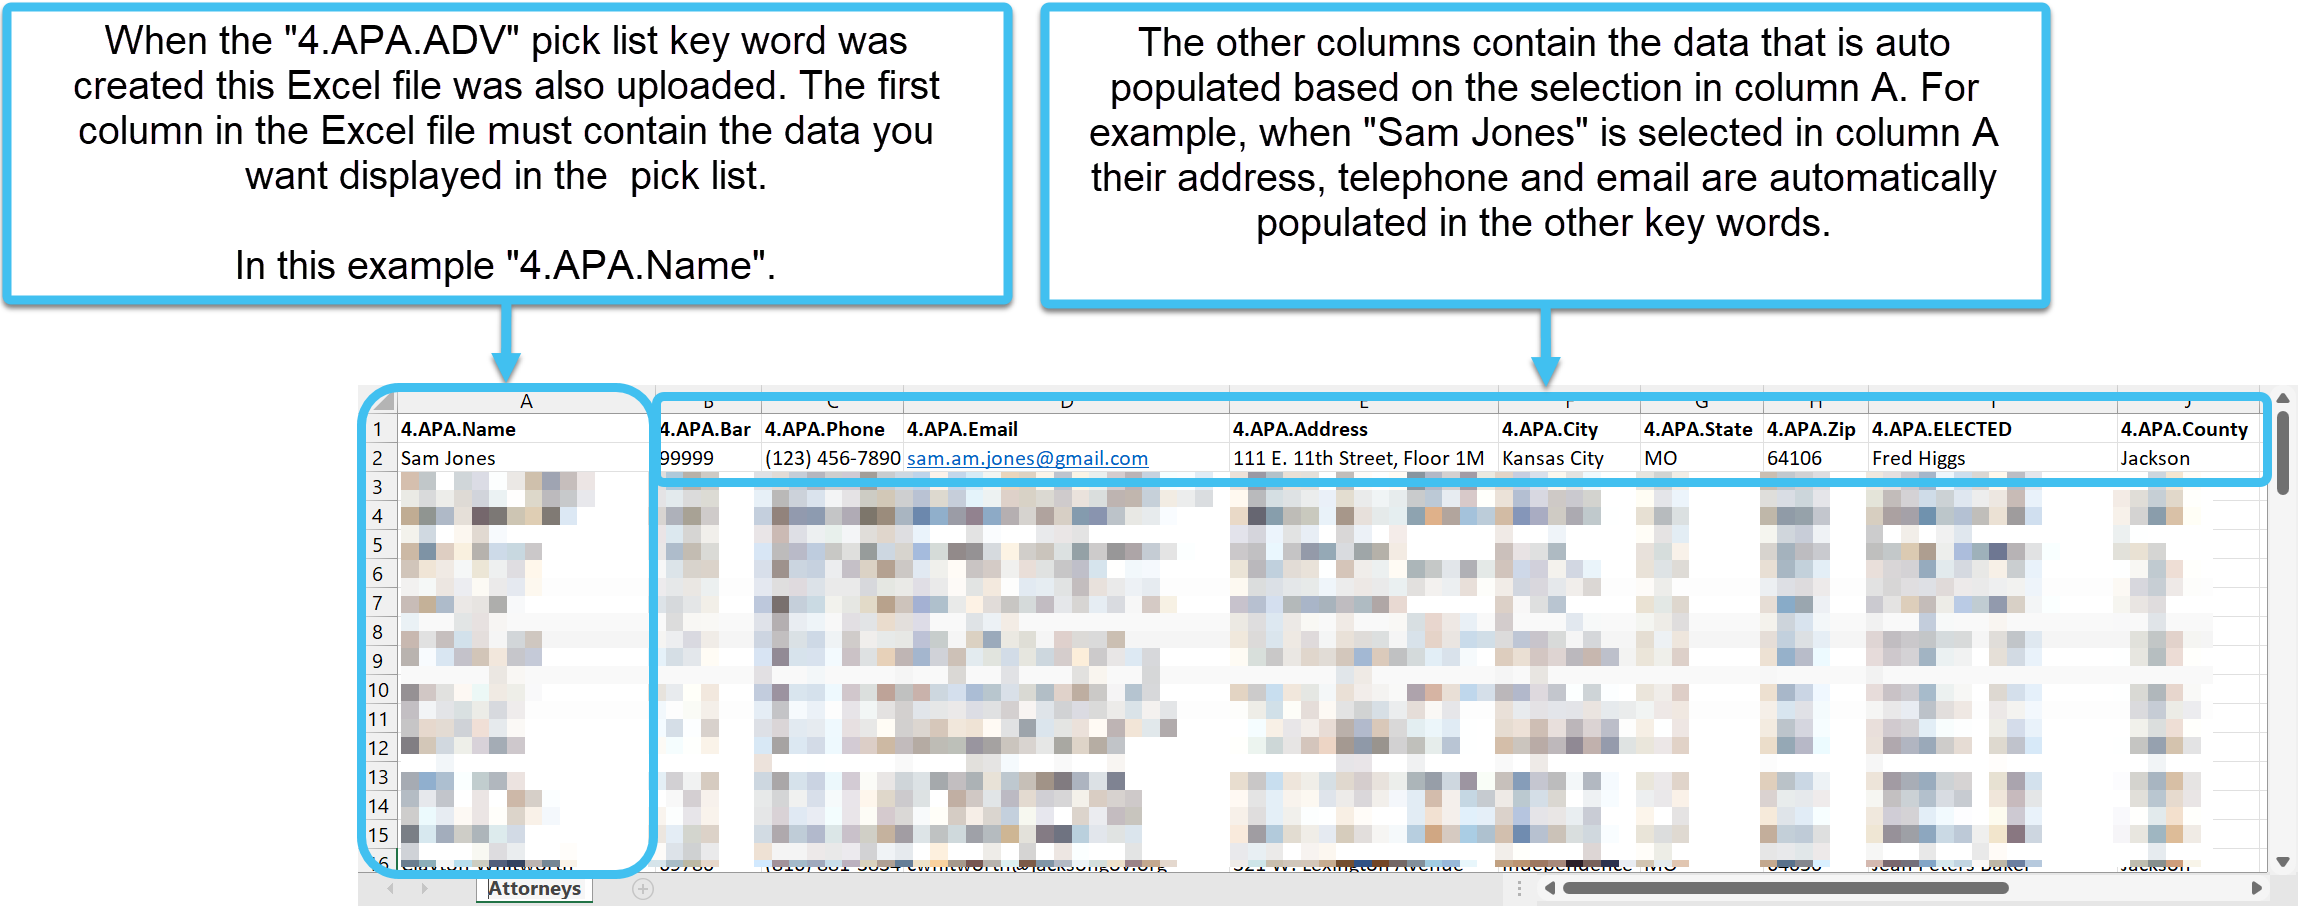
For further information refer to How to create a pick list.
Click to load the keys that are in the selected Excel file. All the data in the file is displayed on the screen and the pick list key word is now ready to use.
For further information refer to How to create a pick list.